
The Seedman Garden-to-Loaf Project
Grow Your Own Grain for Sourdough Bread — From a Small Garden Plot to a Homemade Loaf
For most of us, bread begins with a bag of flour. But flour begins with a seed, and growing that seed yourself can turn an ordinary loaf of sourdough into a genuine garden-to-table project. The Seedman Garden-to-Loaf Project was created for gardeners who are curious about growing their own bread grain but do not want to commit a field or buy farm equipment just to find out whether they enjoy the process. A 100-square-foot plot — only 10 by 10 feet, 5 by 20 feet, or 4 by 25 feet — is large enough to learn the complete process on a very manageable scale.
Sourdough is made by fermenting flour and water with a living starter containing naturally occurring yeasts and lactic-acid bacteria. The long fermentation develops the characteristic flavor and can change the availability of minerals and some components of the grain. Traditional sourdough is still bread made from grain, however, and wheat, spelt, einkorn, Khorasan and rye contain gluten or related gluten-forming proteins; ordinary sourdough should not be considered gluten-free or suitable for someone with celiac disease. What makes this project special is simpler: you can grow the grain, harvest it, clean it, mill it and bake with flour whose entire journey you know.
The complete process is straightforward when divided into steps: Plant → Grow → Ripen → Harvest → Dry → Thresh → Winnow → Store → Mill → Bake. On a small plot, harvesting can be done with hand shears or a sickle, threshing can be done over a clean tarp or inside a sturdy container, and winnowing can be accomplished with a household fan and two containers. No combine or commercial grain equipment is necessary for an experiment of this size.
How much bread can 100 square feet produce? Grain yields vary tremendously with climate, variety, planting date, fertility, birds, disease and harvest losses. A productive 100-square-foot plot can provide several pounds of clean grain and, under favorable conditions, enough flour for several substantial loaves — sometimes roughly 6 to 10 depending on yield and loaf size. Think of the first plot as an experiment rather than a guaranteed bread quota. The real reward is learning the entire process inexpensively before deciding whether you would like to grow a larger area the following season.
Which grain should I grow?
Hard Red Spring Wheat: the classic choice for hearty whole-wheat bread and strong bread dough.
Hard White Spring Wheat: strong bread wheat with a lighter color and milder flavor.
Winter Rye: deep, earthy flavor and a traditional favorite for sourdough and rye breads.
Spelt: an ancient hulled wheat with a pleasantly nutty, slightly sweet character.
Einkorn: one of the earliest cultivated wheats, with rich flavor and a very different, softer dough behavior.
Khorasan Wheat: a large-kernel ancient wheat with golden color and a rich, slightly buttery flavor.
Important before you choose: Hard red and hard white bread wheats are the easiest place for a first-time grain grower to begin because clean kernels separate relatively readily from the mature heads. Spelt and einkorn are hulled wheats: after threshing, the edible kernel normally remains enclosed by a tough hull and requires an additional dehulling step before milling. Khorasan and rye have their own baking characteristics as well. These differences are part of the fun, but they are worth understanding before planting.
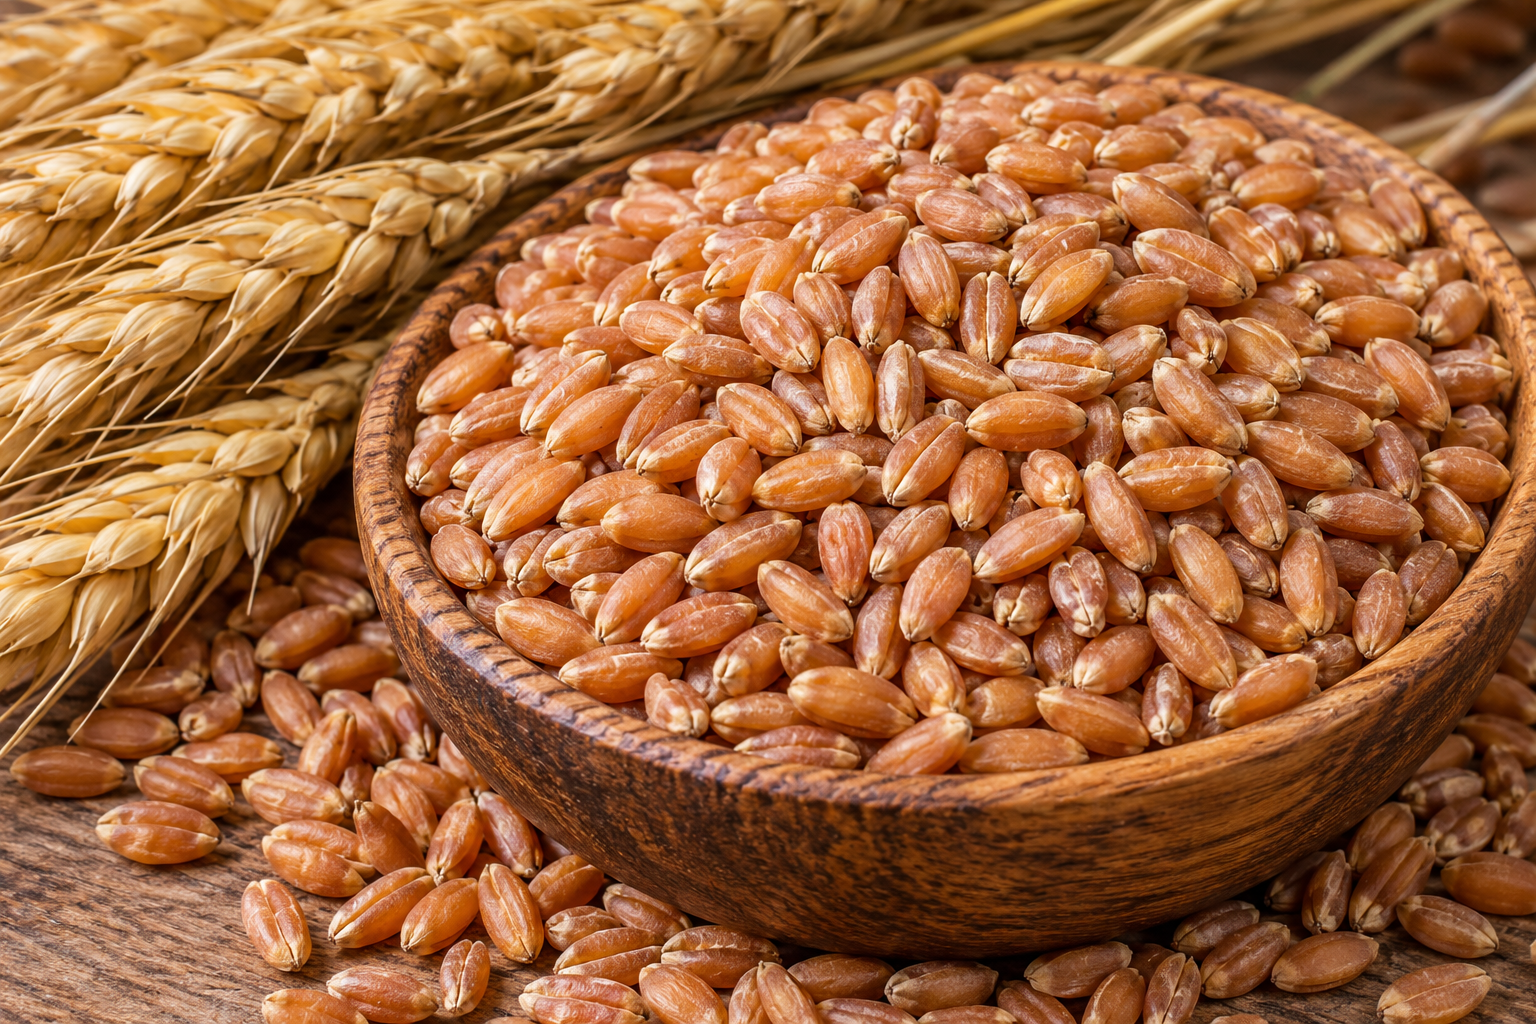
The Classic Bread Grain. Hard Red Spring Wheat is an excellent starting point for the Garden-to-Loaf experiment. It is a bread wheat valued for relatively high protein and strong dough-forming qualities, producing flour with a robust, traditional whole-wheat flavor. Spring wheat does not require a winter chilling period; it is planted as early as workable soil and local conditions permit, grows through the cool spring and early summer, and is harvested after the heads and stems mature to a dry golden color.
Growing: Choose full sun and a well-drained garden bed. Remove perennial weeds before planting, rake the soil to a fine seedbed, broadcast the seed as evenly as possible, then rake or press it approximately 1 to 1½ inches into the soil. Keep the seedbed reasonably moist during establishment. Wheat benefits from fertile soil but excessive nitrogen can produce weak, lush growth that lodges before harvest. Spring planting dates vary greatly by region, so plant early enough that flowering and grain filling occur before the hottest part of summer whenever your climate permits.
Harvest and Processing: Allow the crop to finish naturally. The heads, upper stems and kernels lose their green color as the grain reaches maturity. For hand harvest, wait until the plants are straw-colored and the kernels are hard enough that they cannot easily be crushed with a fingernail. Cut the stems below the heads, bundle loosely, and finish drying under cover in a dry, well-ventilated place. Thresh by rubbing, beating or treading the completely dry heads over a clean tarp or inside a large container, then winnow away the lighter chaff. Dry the cleaned kernels thoroughly before airtight storage. For long-term storage, a grain moisture meter is the safest way to confirm dryness; wheat stored for extended periods is commonly kept near 13 percent moisture or below. Mill only the amount you need for the freshest whole-grain flour.
Seedman Notes: If this is your first attempt at growing bread from the ground up, Hard Red Spring Wheat is our natural starting recommendation. It lets you learn planting, harvesting, threshing, winnowing and milling without the extra dehulling step required by some ancient grains. Freshly milled hard red wheat makes a hearty, aromatic whole-grain sourdough and can also be blended with other homegrown grains as you gain experience.
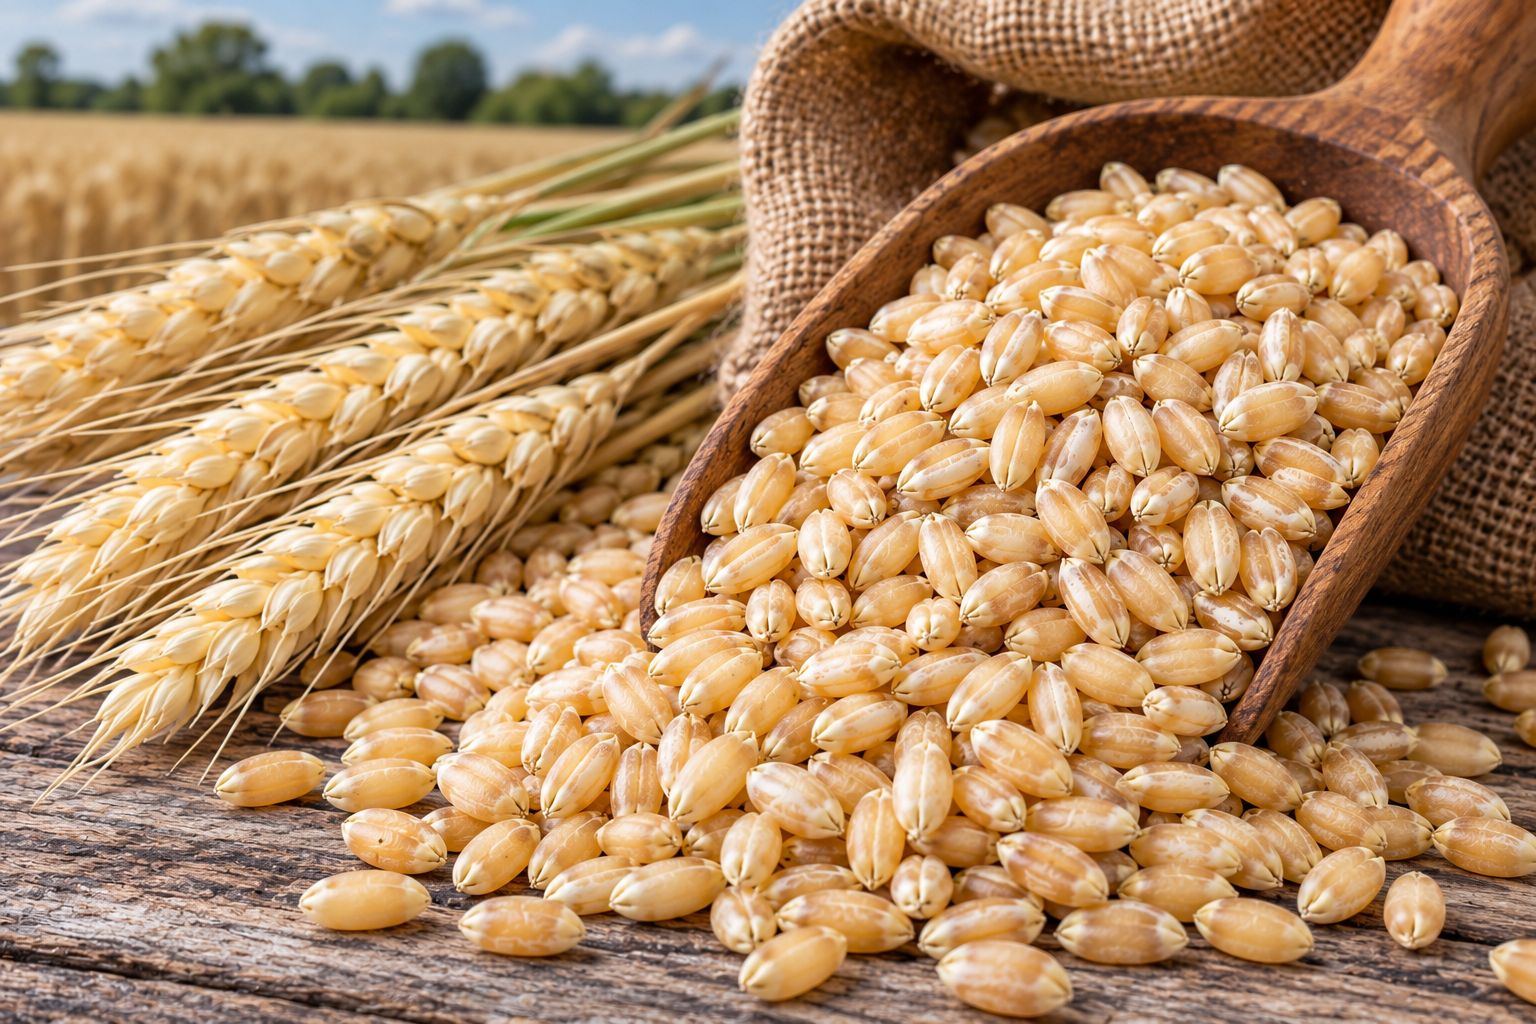
The Milder Bread Wheat. Hard White Spring Wheat offers many of the bread-making advantages of hard red wheat but produces a lighter-colored whole-grain flour with a milder, less tannic flavor. The bran is pale rather than reddish brown, making this a particularly appealing grain for gardeners who want whole-grain nutrition and bread structure while preferring a gentler wheat flavor. It can be used for sourdough boules, sandwich breads, rolls and blends with ancient grains.
Growing: Culture is essentially the same as for hard red spring wheat. Plant in full sun in a clean, well-drained seedbed as early in spring as local conditions allow. Broadcast evenly and rake or press seed about 1 to 1½ inches deep, keeping the bed moist through germination and early establishment. Once rooted, wheat is reasonably resilient, but reliable moisture during stem development, flowering and grain filling helps produce plump kernels. Avoid waterlogged soil and excessive nitrogen.
Harvest and Processing: Harvest when the stand has turned golden, the heads are dry, and the kernels are hard rather than soft or milky. Cut on a dry day after dew has disappeared and allow the sheaves or loose heads to finish drying under cover. Thresh only when thoroughly dry; dry heads release grain much more readily. Winnow the threshed material outdoors or in a protected work area by allowing a gentle fan to blow away the lighter chaff while the heavier kernels fall into a clean container. Clean, fully dry grain can then be stored whole and milled as needed.
Seedman Notes: Hard White Spring Wheat is a very good choice for families who find traditional whole-red-wheat bread too assertive. It provides an interesting side-by-side experiment with Hard Red Spring Wheat: grow a small bed of each, mill them separately, and compare color, aroma, dough behavior and flavor in otherwise identical sourdough loaves.
.jpg)
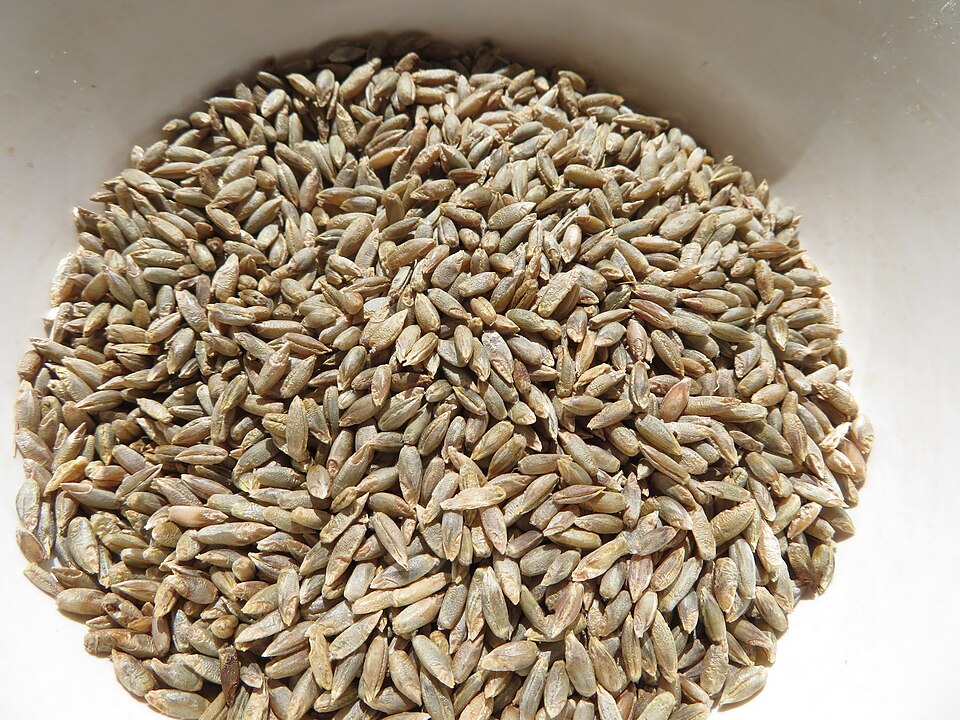
The Traditional Sourdough Grain. Winter Rye has a deep, earthy flavor and a long association with naturally fermented breads. Rye flour behaves very differently from wheat flour: it develops less elastic gluten structure, absorbs substantial water, and contributes flavor and fermentation activity even when used as only part of a wheat-based loaf. Gardeners can use homegrown rye for 100-percent rye breads or mill smaller amounts to add complexity to wheat sourdough.
Growing: Winter rye is normally fall planted, establishes before cold weather, survives winter and resumes vigorous growth in spring. It is exceptionally cold tolerant and adaptable, and it can perform on soils where wheat may struggle. Planting time depends strongly on location: northern gardeners sow early enough for establishment before winter, while gardeners in the South can generally plant later in fall. Sow in full sun in a prepared seedbed, about 1 to 1½ inches deep, and provide good seed-to-soil contact. Rye grows tall and can lodge if excessively fertilized.
Harvest and Processing: Let the heads and straw turn golden and the kernels become hard. Mature rye can shatter if left standing too long, so watch the crop closely as it dries. Cut the heads or stems, finish drying them under cover, thresh over a tarp or in a container, and winnow away chaff. Because rye is susceptible to sprouting if mature grain remains wet in the field, timely harvest during a dry spell is desirable. Store only thoroughly dry, clean kernels in food-safe airtight containers in a cool, dry place.
Seedman Notes: Rye may be the most interesting second grain for a sourdough baker to grow. Even a modest amount of freshly milled rye can noticeably change the aroma, fermentation and flavor of a loaf. Winter rye also gives the gardener a different experience from spring wheat because the crop occupies the garden through winter and finishes the following season.
.jpg)
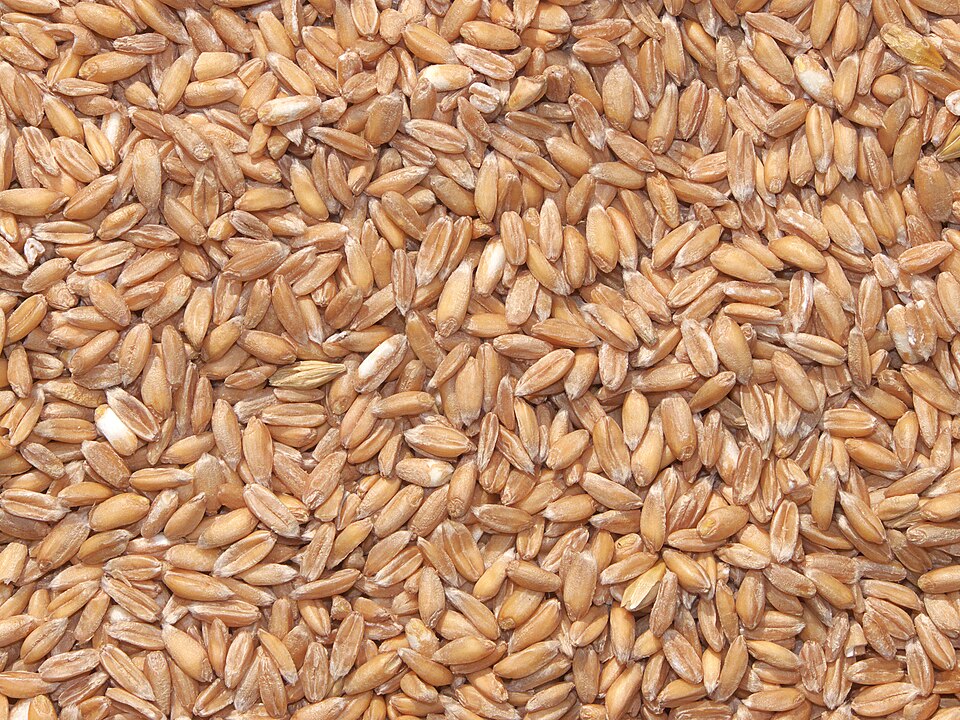
The Ancient All-Purpose Grain. Spelt is an ancient relative of common bread wheat prized for its pleasantly nutty, slightly sweet flavor. Whole spelt flour makes flavorful sourdough, rustic breads, pancakes and other baked goods, but spelt dough is generally more extensible and less tolerant of aggressive mixing than modern bread-wheat dough. For the gardener, its history and distinctive grain make it one of the most satisfying crops in this collection to grow from seed to flour.
Growing: Spelt has traditionally been grown as a cool-season cereal and is valued for its ability to perform under comparatively modest conditions. Plant in full sun in a well-drained prepared bed. Exact spring-versus-fall planting depends on the seed strain and your climate; where the strain is winter type it is fall sown, while spring types are planted early in spring. Sow approximately 1 to 1½ inches deep with good soil contact and avoid excessive nitrogen that encourages lodging.
Harvest, Threshing and the Important Extra Step: Harvest when the stems and heads are dry and golden and the kernels have hardened. Cut, finish drying under cover and thresh as you would wheat. Unlike modern free-threshing bread wheat, spelt is a hulled wheat. Threshing separates the spikelets from the stalk, but the kernels normally remain enclosed in tough hulls. Those hulls must be removed before the grain is milled for food. Small quantities can be dehulled with suitable home-scale equipment or carefully worked in small batches and screened/winnowed afterward. Because this extra step takes time, we recommend beginning with a small plot.
Seedman Notes: Spelt is ideal for the gardener who wants the project to include a little agricultural history as well as bread. The extra dehulling work is real, but on a 100-square-foot experiment it is manageable enough to teach exactly why hulled ancient wheats were eventually displaced by easier-threshing bread wheats. The reward is a flavorful grain quite different from ordinary supermarket flour.
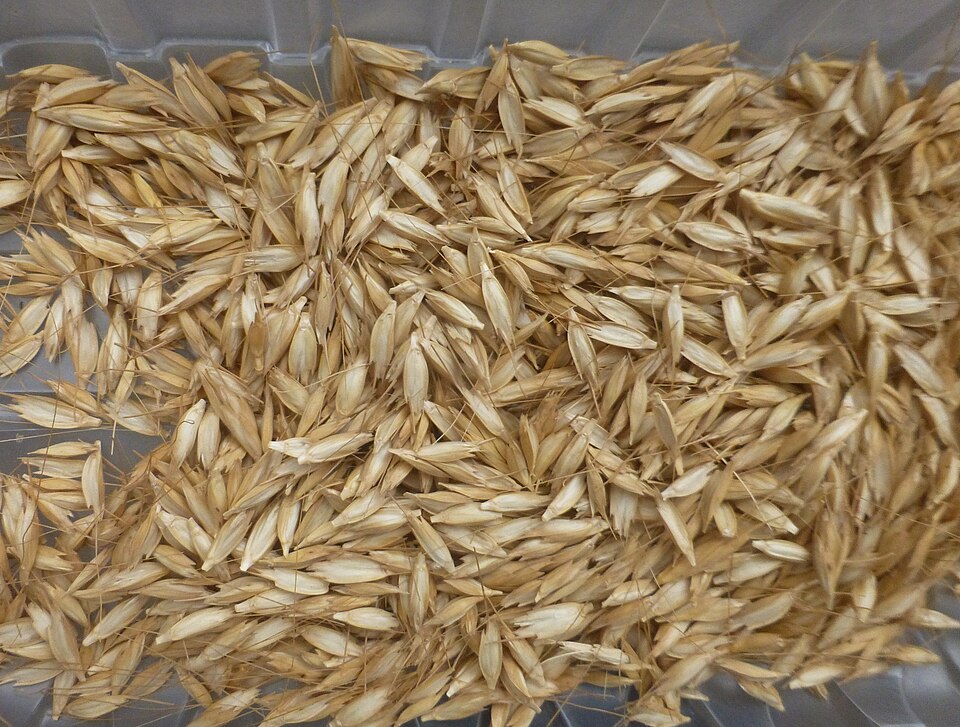

The Ancient Wheat Experiment. Einkorn is one of the earliest domesticated wheats and is genetically much simpler than modern bread wheat. Its small kernels produce a rich, golden whole-grain flour with a distinctive nutty flavor. Einkorn can make excellent naturally fermented breads, but its dough does not behave like strong modern bread wheat; it is usually softer, stickier and less able to hold a tall loaf. That difference is part of the attraction for bakers who enjoy learning how individual grains behave.
Growing: Einkorn is noted for tolerating relatively lean soils and challenging growing conditions, although a clean, sunny, well-drained garden bed will make harvesting much easier. Planting season depends on the strain and local climate, so treat it as a cool-season cereal and avoid forcing it through the hottest part of the year when possible. Sow about 1 to 1½ inches deep, maintain moisture through establishment, and avoid excessive nitrogen.
Harvest, Threshing and Dehulling: Harvest when the plants are completely straw-colored and the grain is hard and dry. Cut carefully because ripe ancient-grain heads can be more brittle than modern wheat. Finish drying under cover, then thresh. Einkorn is a hulled wheat; after threshing, the grain normally remains enclosed in a protective hull. Dehulling is therefore a separate operation before milling. For a small experimental crop, process in small batches and separate loosened hulls by screening and winnowing. Do not put hulled spikelets directly into a flour mill unless the mill manufacturer specifically says the machine is designed for that purpose.
Seedman Notes: Einkorn is probably the most historically fascinating grain in this collection and also the one most likely to teach the grower something new. It may yield less than modern bread wheat and requires additional processing, so we would not choose it when maximum pounds of flour are the goal. We would choose it when the goal is to experience an ancient grain from seed to loaf and taste flour very different from modern wheat.
.jpg)
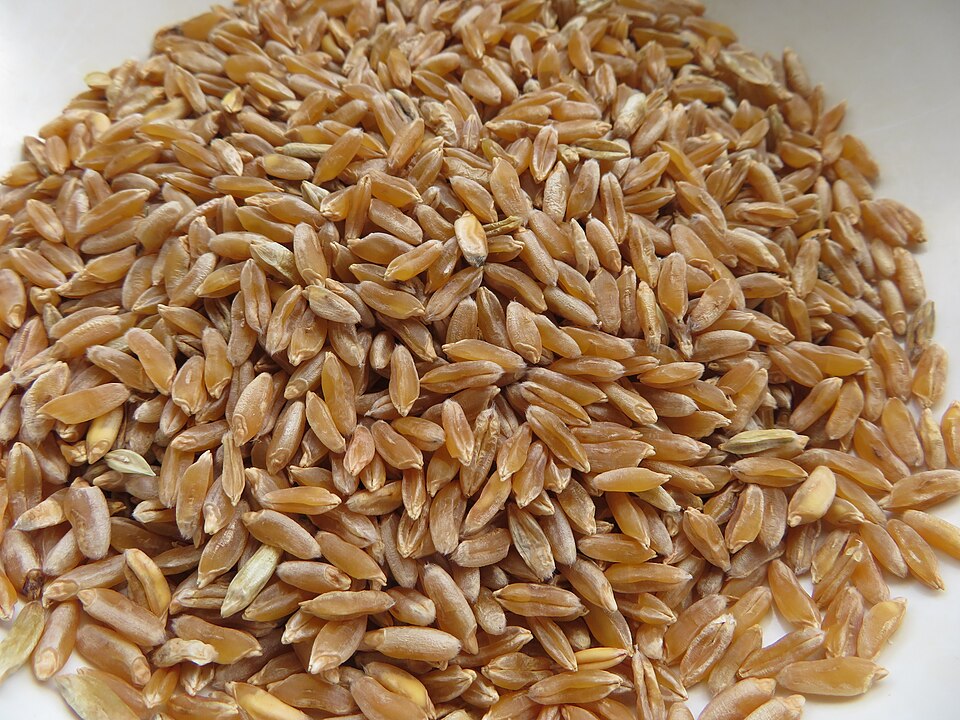
The Rich Golden Grain. Khorasan Wheat is an ancient tetraploid wheat recognized by its unusually large kernels and rich golden color. Its flour has a full, slightly sweet, nutty-to-buttery character that makes it especially interesting in artisan breads and sourdough blends. Khorasan is related to durum-type wheats and should not be confused with KAMUT®, which is a trademark used for grain meeting that brand's particular standards.
Growing: Grow Khorasan in full sun in a well-drained bed and treat it as a cool-season cereal. It is often best adapted to relatively dry climates and can be less forgiving of prolonged humidity or waterlogged soil than ordinary bread wheat. Planting season varies by region and seed strain; sow at the locally appropriate small-grain season, about 1 to 1½ inches deep, with good seed-to-soil contact. Avoid excessive fertility that can encourage lodging in taller grain plants.
Harvest and Processing: Harvest when the plants have lost their green color, the heads are golden and dry, and the kernels are firm and fully developed. Cut during dry weather, finish drying under cover if necessary, thresh thoroughly, and winnow until the large kernels are clean. Continue air-drying if there is any doubt about storage moisture before sealing the grain in food-safe containers. Mill in small batches and experiment with Khorasan alone or blended with hard wheat until you find the dough strength and flavor you prefer.
Seedman Notes: Khorasan is a wonderful bridge between modern bread wheat and the more labor-intensive hulled ancient wheats. The oversized kernels and golden flour make the harvest visually distinctive, while the flavor is different enough that the finished loaf clearly reflects the grain you chose to grow. For a first ancient-grain experiment, it is an especially appealing selection.
The Seedman Garden-to-Loaf Instruction Guide
1. Choose and Prepare Your Plot
A 100-square-foot plot is deliberately small enough to manage by hand. Choose the sunniest practical location with well-drained soil. A 10-by-10-foot square is easy to visualize, but a 5-by-20 or 4-by-25-foot bed works just as well. Remove established weeds before planting because separating weeds from a mature stand of grain is far more difficult. Loosen and level the top few inches of soil, break large clods, and create a reasonably firm seedbed. Grain does not need the deeply cultivated, heavily enriched soil used for many vegetables.
2. Decide Whether Your Grain Is Spring or Fall Planted
This is one area where gardeners should follow their local climate rather than a single nationwide calendar. Spring wheat is planted early in spring. Winter rye is fall planted and requires a period of winter growth/dormancy before finishing the following year. Ancient wheat seed lots may be spring or winter types depending on the strain. In the Deep South, cool-season grains are often grown primarily through fall, winter and spring because summer heat arrives early; in colder regions, spring cereals can be planted as soon as the soil is workable. If you are uncertain, your local Cooperative Extension planting calendar for wheat or cereal rye is an excellent guide to timing.
3. Sow the Grain
For a hand-planted garden plot, divide the seed into two equal portions. Broadcast the first half while walking in one direction and the second half while walking at right angles to the first pass. This simple cross-broadcasting method produces a more even stand. Rake gently so most seed is approximately 1 to 1½ inches deep, then firm the surface with the back of a rake, board or light roller. Water gently enough to settle the soil without washing seed into piles. The 4-ounce packs on this page are intended as convenient small-plot quantities of roughly 100 square feet; actual ideal plant population varies with grain type, seed size, germination percentage, planting date and growing conditions.
4. Care for the Growing Crop
Keep the bed evenly moist through germination and early establishment. Once grain has rooted deeply, water according to rainfall and soil conditions rather than on a rigid schedule. The most important periods to avoid severe drought are active stem growth, flowering and grain filling. Keep weeds under control while the grain is young; once a dense stand develops, it competes surprisingly well. Avoid excessive nitrogen fertilizer. Too much nitrogen can create tall, lush plants that fall over, or lodge, before the grain is ready to harvest.
5. Watch the Grain Fill
After flowering, kernels progress through watery, milky and dough-like stages before becoming hard grain. Do not harvest simply because the lower leaves begin to yellow. The crop needs time to transfer stored energy into the kernels. As physiological maturity approaches, green disappears from the kernels and from the stem immediately below the head. After that point the kernels continue losing moisture but no longer gain significant dry weight.
6. How to Know When It Is Ready to Hand Harvest
For the home gardener, the simplest harvest signals are visual and physical. Most of the stand should be straw-colored rather than green, the heads should feel dry, and the kernels should be firm and difficult to dent with a fingernail. Bite or press a few representative kernels: properly mature grain is hard, not milky or doughy. Harvest during a stretch of dry weather if possible. Do not leave fully mature grain exposed to repeated rain indefinitely; wetting can encourage sprouting, molds, discoloration and shattering losses.
7. Hand Harvesting
For 100 square feet, use sturdy scissors, pruning shears or a hand sickle. Cut just below the heads if you want the least straw to handle, or cut longer stems and tie them into small bundles if you prefer the traditional method. Work over a tarp whenever practical because mature heads can shed grain. Label different grains immediately if you are harvesting more than one kind.
8. Finish Drying Before Threshing
If the heads are not absolutely dry, spread them thinly on screens, clean cloth or paper, or hang small bundles in a dry, shaded, well-ventilated place protected from rain, rodents and birds. Do not seal damp heads in plastic. The drier the mature heads become, the easier most grains are to thresh. A small fan can improve air movement, but keep the crop contained so loose kernels are not blown away.
9. Threshing Without Farm Machinery
Threshing means separating the grain-bearing material from the stalk and head. For a garden quantity there are several simple methods. Put dry heads into a clean heavy bag or sturdy food-safe container and beat or rub them; rub heads between gloved hands over a tarp; or place heads on a clean tarp, fold the tarp over them and gently tread or beat the covered material. The goal is to release grain without grinding it. Work in small batches. Spelt and einkorn will still have hulls around their kernels after ordinary threshing and require dehulling later.
10. Winnowing: Separating Grain from Chaff
Winnowing uses moving air to separate heavy kernels from lighter pieces of straw, hull and chaff. Place one clean container in front of a household fan set on low. Slowly pour the threshed mixture from another container through the air stream. The grain should fall into the receiving container while lighter material blows beyond it. Begin with very little airflow and increase only as necessary; otherwise you may winnow your grain across the yard. Repeat several times, then hand-pick or screen any remaining debris. Work outdoors or in an easily cleaned area because chaff travels remarkably well.
11. Dehulling Spelt and Einkorn
This is different from winnowing. In hulled wheats the protective hull adheres around the kernel and must be mechanically loosened before it can be blown or screened away. Home-scale grain dehullers are available, and experimenters sometimes adapt small mechanical methods for tiny batches, but results vary. Do not confuse the husk with the bran: the hull is inedible material that must be removed, while the bran is part of the edible whole grain and remains when you make whole-grain flour. If the dehulling step sounds like more work than you want for your first season, begin with Hard Red or Hard White Spring Wheat and save Spelt or Einkorn for the next experiment.
12. Drying and Safe Storage
Grain that feels dry can still contain enough moisture to mold in sealed storage. Commercial recommendations commonly place wheat near 13 to 14 percent moisture for safe storage, with the lower end preferred for longer storage. For a home grower who plans to keep grain for months, an inexpensive grain moisture meter removes much of the guesswork. Continue drying clean grain with good air circulation until it is safely dry, then store in clean, food-safe, airtight containers in a cool, dry, dark place. Check stored grain periodically for condensation, insects, musty odor or heating. Never mill or eat moldy grain.
13. Milling Your Homegrown Grain
A countertop grain mill makes the project much easier, but choose a mill intended for dry grain and follow its manufacturer's instructions. Mill only clean, dry, dehulled kernels. Whole-grain flour contains the bran, germ and endosperm, so it has more natural oils than refined white flour and is best used fresh or stored cool. Milling immediately before mixing your dough is one of the pleasures of the Garden-to-Loaf project: the aroma of freshly cracked and milled grain is noticeably different from flour that has spent months on a shelf.
14. Baking With Freshly Milled Flour
Do not expect every grain to behave like commercial bread flour. Hard red and hard white wheat provide the strongest starting point for lofty wheat breads. Rye contributes wonderful flavor but develops a very different dough structure. Spelt can become slack if overmixed. Einkorn is naturally softer and often benefits from gentler handling and adjusted hydration. Khorasan brings rich flavor and color but may be easiest at first as part of a blend. When trying a new homegrown grain, begin by replacing 10 to 25 percent of the flour in a familiar sourdough formula. Once you understand how the flour absorbs water and ferments, increase the percentage if desired.
15. A Simple First Garden-to-Loaf Test
The easiest first baking experiment is not to change everything at once. Use the sourdough recipe and starter routine that already works for you, but substitute a measured portion of freshly milled homegrown flour for the flour you normally use. Keep notes on the grain, percentage used, hydration, fermentation time, dough feel, loaf volume and flavor. On the next loaf, change only one variable. Within a few bakes you will know far more about your grain than any generic recipe can tell you.
A Note About Sourdough and Health Claims
Sourdough fermentation is a fascinating biological process and research has shown that fermentation can alter phytate, organic acids, carbohydrates and grain proteins in ways that may affect mineral availability, flavor and digestibility. Results depend on the grain, starter organisms, fermentation time and baking method, so we prefer not to promise specific medical benefits. Baking also means the finished loaf should not be described as a live probiotic food. Most importantly, sourdough made from wheat, spelt, einkorn, Khorasan or rye is not gluten-free and should not be considered safe for people with celiac disease unless produced under medically validated gluten-free conditions using appropriate gluten-free ingredients.
Seedman Garden-to-Loaf Notes
Your first grain plot does not have to be efficient to be successful. The purpose of a 100-square-foot experiment is to learn. You will discover how cereal grasses tiller, how grain heads change as they ripen, how much chaff comes from a surprisingly small harvest, how winnowing actually works, and how dramatically freshly milled grain can change the character of bread. If you enjoy the process, doubling or tripling the plot the following season is easy. If you decide that threshing grain by hand is not for you, you have spent only a few dollars and gained an unusually complete gardening experience.
For over a thousand more unique seed varieties, all in stock and ready to ship, visit our Seed Catalog Index Page.

Contact Us | Privacy Policy | About Us
Serving gardeners since 1992
State of Mississippi Seedmen's Permit #C-391, Ohio 90152, Minnesota 20086777